
3D PACT Trainee Station (ES)
约 475 个字 预计阅读时间 2 分钟
Contents
Overview & Key Concepts
The purpose of the Engineer Station and its relationship to the Instructor Station
- [The Flow from Setup to Export]
- Asset Bundles — What are Asset Bundles, and why do we use them?
- Interactables — An introduction to the two components of an interactable
[Creating Interactables]
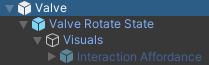
The following steps outline how to set up a basic select, grab, rotate, poke, or pull Interactable, using a rotatable valve as an example.
-
Drag your model from the
Project Folderinto the scene and name it -
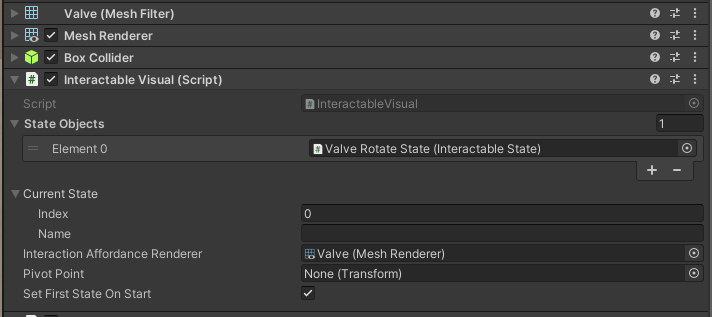
Add the following components to the model
Game Objectto make itInteractable:-
Interactable Visual -
A
Collider
-
-
Navigate in the
Projectto ‘Client Files’ → ‘Prefabs’ → ‘Interaction States’ -
Identify which interaction(s) you require and drag the relevant
Interactable Stateprefab(s) into the scene. It does not matter where in the scene you place the prefab -
Rename the prefab to indicate what
Interactableit relates to
-
On the
Interactable, drag theInteractable Stateprefab(s) into theState Objectsarray on theInteractable Visualcomponent- If the
Set First State On Startbool is true, theInteractablewill occupy the firstInteractable Statein theState Objectsarray on start during runtime
- If the
-
On the
Interactable, optionally drag itsMesh Renderercomponent into theInteraction Affordance Renderervariable on theInteractable Visualcomponent- This will enable colour changes to the
Interactable’s material when you hover, select, or activate it (press trigger) during play mode
- This will enable colour changes to the
-
If you wish to switch between
Interactable States, you will need to create someVisual Scriptinglogic. This is discussed in the section Visual Scripting Interactable Logic.
[Visual Scripting Interactable Logic]
Visual Scripting in the context of Interactables is most commonly required in two cases:
-
To switch between
Interactable States- to change from one type of interaction to another, i.e. a select interaction to a pull interaction -
To track the progress of an interaction and do something when the progress has been reached. For example, if a valve is opened (its minimum rotation limit is reached), a fire should start. Progress is tracked between Start and End. Each
Interactable Statehandles progress between Start and End differently. These particulars are outlined in the [Interactable States] section.
Scripts in Visual Scripting are called Graphs. There are two kinds: Script Graphs and State Graphs. A Script Graph contains logic, while a State Graph contains behaviours that can transition between one another. This section will be focusing on State Graphs, although Script Graphs can be used as well. For more information on Visual Scripting in Unity, refer to the Unity Visual Scripting page.